- Kryolan Skin Base
- Illamasqua Satin Primer
- Illamasqua Translucent Powder
- Kryolan Glamour Glow
- Kryolan Dermacolour Camo mini palette
- Charles Fox Foundation Brush
- Charles Fox Blush Brush
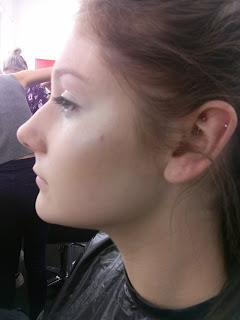
Okay so like ever other time I had to cleanse and tone the face to make sure that it is free of any previous make up that might get into the new make up. Once that was done I made sure I had washed my hands, tied up the models hair and covered her in an apron. I then placed a small amount of Illamasqua's satin primer on the back of my hand and then added some of the Kryolan Skin base. Making sure that I had the right skin tone I started from the nose outwards and worked my way around the face. I found when applying the base and matching the skin tone to the base a lot easier as I had done it once before.
After I had applied the base I dabbed a small amount of the Translucent powder to make sure the base had set. This is where things got interesting. So to contour the face you want to find the areas that dip in and make it even more noticeable. The areas that you would have to contour are under the cheekbones, lightly uner the lower lip and either side of the nose, at the temple and along the hairline. A lot of these are easy as it's common sense as to where they are on the face but trying to do the cheekbones means you have to feel around your models face (with their permission of course) so that you can feel where the cheekbones end and where you need to contour. So after touching up my models face for a bit I placed a small amount from the Glamour Glow palette under the cheekbones to outline where I would need to contour. Or at least that's what I tried to do. The Glamour Glow comes out a lot stronger than it looks on the brush so I had to blend out what I had placed and use that as the contour. I then had to do the same thing on the other side, and we all know I struggle with making things even.
Once I got the cheekbones done I moved onto the rest of the face and I feel that actually it turned out a lot better than I thought it would.
The last thing that I had to do was to highlight the face. And not the kind of highlight that you would use to make pieces of text stand out. Using a base colour that is a shade or two lighter than the original base, place it on the areas of the face that pop out such as the cheekbones, the bridge of your nose and the middle of your forehead. I don't think you could really notice the highlight when I did so I think that is something that I need to work on in the future.


No comments:
Post a Comment